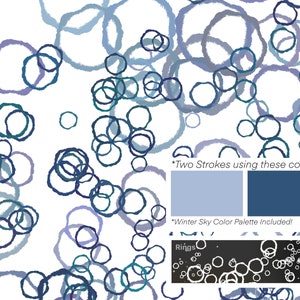
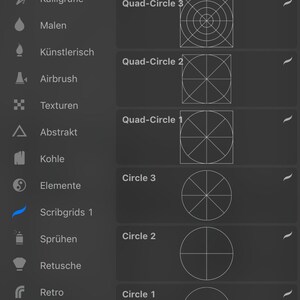
With this brush set, you get endless possibilities, from creating shapes to funky patterns, textures, ink splashes, and much more. Get started today with our Nala Club Savings Account or the Nala Club 32 Days Account to safely grow your stokvel money. Lets just say how the brush is working. Doesn't matter what color you are going to drop, I'm going to use an orange. Click on a brush which opens up Brush Studio. Intense glaze, patterns pretty much disappeared. Here's a tutorial for making repeating patterns in Procreate. I'm going to the Shape tool because we're going to select a shape source for our brush. This brush set featuring a set of 20 brushes, which is a handy tool that helps you save time and create amazing artwork.
Learn more. Select it and use the flip horizontal tool to flip it. Now we can get rid of our pink filled layer. But if you just keep painting and not painting over the same area, then you won't have that effect. My document is 2,048 by 2,048 that's what I want my circle to be. I read and respond to all comments and questions, and I look at and respond to every class project. 'Thanks for being a part of our original community!' I would set one thing and one to another. scribbear Making compositions and including adorable pattern elements is a breeze thanks to the simple circle design. 1. Think of it like tile. That's why I'm building in gray into my brush because it gives it so much more visual interest. That's fine. But you do have the ability to fill any gaps in if you think that there are some gaps. Well, it's working really nicely here. Looks like you already have an account! Just Creative is supported by its audience. You'll find it easier when you're doing these patterns and particularly when you're doing more sophisticated patterns later on to line everything up if you take a square that is the size of the canvas with you. The teacher's recommendation is shown until at least 5 student responses are collected. Let's tap this and now I can set my own dimensions, 1024 by 1024, and is placed up in the top corner. Tap the plus sign. Then I'll just scrub slightly to the right across this layer to select it too.

Let's go back to the brush. As soon as you see something like this where the selection doesn't encompass the whole document, don't go moving it, is just not going to work reliably. If you have any issues downloading it, please message me. Set where you live, what language you speak, and the currency you use. Access all brushes first week for only 1$. This time it will probably help me to have magnetics turned on. Now we're going to have similar problems with this brush that we've had with all the other brushes.
procreate Test your brush and make adjustments as needed. Now we go to Shape. I'll tap the Transform tool again. These recommendations help other students to say that this is the class that they too might enjoy and learn from. Let's go back, and add a new layer to this document. In fact, I might make it a little bit lighter still. I'm going to add a new layer because that will allow me to get rid of my marker layer later on just by deleting it. I've got my distance set to max. Looking much better.

We're going to Rendering because we know that we'll get a better result with light glaze. This brush is super simple to make. StokFella is an authorised Financial Services (FSP48812) and Credit Provider (NCRCP12735). Brushset for iPad/iPad Pro Procreate, It includes the brush (classic brush, draw it to continously draw the pattern) aswell as a "stamp" brush (i call it stamp brush because it creates a big pattern of the brush) for Procreate.I also include .SVG and .EPS files of the source pattern so you can use it in other programms if you want :)))WORKS ONLY WITH PROCREATEDownload the File.Send it to your iPad (e.g.
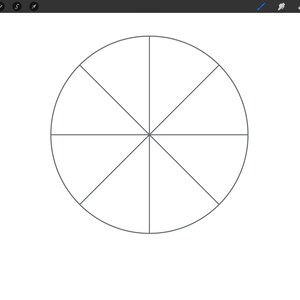
I'm going to take each and the current piece so then I can move them into a different location. You're going to draw a circle. Open your project in Procreate and click on brush icon at the top right corner8. Renews at 29$/month. Worth the money! Tap the "Gear" icon, tap ''Add'', tap "Copy Canvas", go to the brush. I'll just scrub to the left and choose duplicate until I have four copies. Go back to your color, go back to the monoline brush that we were using and then just add some extra dots. If not use this tutorial:1. With this brush set, you can create attractive frames, shapes, borders, motif designs, and much with just a tap of your pencil. - A Procreate for Lunch class, Create Glitter Effects in Procreate - A Procreate for Lunch class, Add a Background to a Pattern in Adobe Illustrator - A Graphic Design for Lunch Class, Taught by industry leaders & working professionals, Topics include illustration, design, photography, and more. Now, if I don't get it to exact values, that's fine because Procreate's going to make a gray scale anyway.
watercolor brushes 
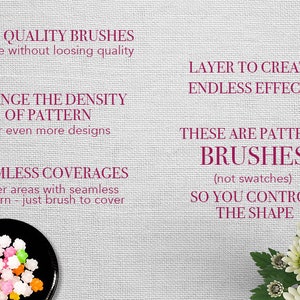
Make sure it snaps. I have over 250 courses here on Skillshare and over 105,000 student enrollments. When you go over an area that you've already painted over, you'll find that that light gray just gets a bit darker. This ultimate brush set helps you to add a wide range of variations to your designs as it comes with a huge collection of exceptional hand-drawn seamless patterns, shapes & brushes, allowing you to start designing straight away. I'm making mine about 2 squares thick. I wanted to split this and put it in the four corners of the document. Get a free mini set of pattern brushes. Want all of these fun pattern brushes? Pt 1 Dots Pattern Brush: This first portion that we're going to create is going to have a pattern of dots underneath it. Now, if you can't get it to scrub and sometimes it doesn't work, you can always just tap on the first layer and merged down, and you can continue to do that until they all merge together.

That's better. Get 10 downloads/month. We know that it is working. Etsy uses cookies and similar technologies to give you a better experience, enabling things like: Detailed information can be found in Etsys Cookies & Similar Technologies Policy and our Privacy Policy. Most of the shapes use the monoline brush, but the hand-drawn shapes use my pencil brush. Now, right now the rendering is that intense glaze, and you can say we can't see those light gray dots. However, keep in mind that transparent brushes need to be used in one stroke or the pattern will layer and you will be able to see where the new strokes begin. Well, our light grays disappeared in part because of rendering. The 15 Best Shape Brushes for Procreate Overview, 200 Simple Shapes Brush Set for Procreate, Autumn Modern Shapes Stamps Pack for Procreate, Hand-drawn Seamless Patterns, Shapes & Brushes, Terrazzo Modern Photoshop and Procreate Brushes, What is the best shape brush for procreate overall.
It does need to be squared because we're going to make a pattern that we're going to use in the brush and patent elements need to be square if you don't want them to be distorted. A pattern is a repeating motif. If the option "Open in Procreate" is missing, click on "More"6. Big grain, little grain, depending on the size of the brush.
procreate ratio Volumes Brush Set for Procreate is a great option for designers and artists looking to use 3D objects or isometric shapes in their designs. I don't want that to be the case. That is actually being painted over and eventually it will just disappear. Kitaleigh is not endorsed or sponsored by Cricut, Silhouette America or Glowforge. Google Drive).And open it with Procreate! Read more , Emy Flint of Ebb and Flow Creative Co is a participant in the Amazon Services LLC Associates Program, an affiliate advertising program designed to provide a means for sites to earn advertising fees by advertising and linking to Amazon.com, Copyright 2022 Ebb and Flow Creative Co, How to Make a Simple Pattern Brush for Procreate, Free Procreate Lettering Brush for Modern Calligraphy, How to Create a Monoline Brush in Procreate, How to Create Digital Downloads for Etsy or Your Blog. 2, Super smooth shader brushes for procreate / Set of 20 brushes / digital texture brushes / Ipad + apple pencil. Please use the grid to help determine the size you require as all sizes are proportionate, Halloween Ghost Pinata for Your Party. Click the select arrow to select the entire shape. Find the new brush set in your Brush libraryYour satisfaction is my number one priority, so please if you have any problems with your order don't hesitate to contact me. StokFella is an awesome platform, it has helped with the ability to manage national Stokvels digitally. You can see here that a Procreate is giving me that width and height value, which is really helpful because it was a 2048 by 2048 document. Text, graphics, whatever, add texture! Disclaimer: Etsy assumes no responsibility for the accuracy, labeling, or content of sellers' listings and products.
procreate brushes One of them is to change the scale of the brush. If you want more than one color, color on top in a different color. Overall, this brush set is perfect for various design projects including, posters, brands, stationery, 3D texturing, packaging, textile design, and much more. To make a simple stripe brush, you create the canvas in the same way as before. I'm going to tap the brush tool. You can a monoline brush in a large size to create a circle.
This site uses cookies to improve your experience and collect statistics. Whitesnake Poster and Metal Art David Coverdale Crying In The Rain Free US Shipping!, Bingo Bronson Embroidery Hoop, Gothic Decor Home Decor Occult Decor Witchy Decor Horror Decor Satanic Decor Skull Decor Pin Mini Frame Dark Art Halloween, Boho Chic Semicircle Diffuser Wall Hanging Small Macrame Half Moon Art Bohemian Color Block Half Circle 100% Recycled Cotton. You can actually adjust what 100 percent looks like. Pt 4 Stars Pattern Brush: For this next brush, we're going to make a pattern of stars and dots. I'll tap the Transform tool. We're getting black and white rather than black and gray. That's perfect. The first thing you should do is contact the seller directly. They're great for adding extra detail to your art, but they can also be used to create texture to an image. If you want the grain to change with the size of the brush then you're going to need to do something different. We've got four light gray and four dark gray. Now make a duplicate, pick up these two, and they're going into the last spot. This is part 1 of a series for making pattern brushes for Procreate. So without further ado, let's get started. }}, {{ alertData().options.dismissButton.text }}, {{ popoverData().options.confirmButton.text }}, {{ popoverData().options.toggle.leftTab.confirmButton.text }}, {{ popoverData().options.toggle.rightTab.confirmButton.text }}, {{ popoverData().options.dismissButton.text }}. So we already know what to do. For this one, I want to use a large, very hard edge brush. Tap the Transform tool. There's our grain. This is the document that I want that's going to be my pattern. This first part is for making very simple pattern brushes. Tom., 1850 Original Antique Hand color print of The Kite Chromolithograph Natural history Bird print Nature print. Now, when we lay down successive lines of painting, the dots are going to just keep the assigned position. I'll go back to my orange layer, drop the color into it. One is to make your brush really, really big and just make sure that you cover everything in the first step. We're coming down to the bottom corner this time. Check them out below: If you are looking for a perfect shape brush for your illustrations and calligraphy; then, you should check out this brush set. Texture brushes are freaking awesome! Moreover, the brushes included in this pack come with size and color-changing options. Now, I'm going back to my orange layer and I'm going to drop the color into it again. That's pretty cool. Then I'm going to put a star about here. Let's say that I did this and thought, well, I've made a mistake. The level is determined by a majority opinion of students who have reviewed this class. Now I can color drop a lighter gray color into this shape. It includes 20 geometric shapes and ten guides for calligraphy that you can use in a wide range of digital projects.
 procreate
 I'm going to type in here to 2,048. Going to my new empty layer. More videos in the Procreate for Lunch Series: 4 Text Effects in Procreate - A Procreate for Lunch Class, Create Glitter Effects in Procreate - A Procreate for Lunch Class, Dimensional Text Effect in Procreate - A Procreate for Lunch Class, Make Wreaths in Procreate - A Procreate for Lunch Class, Procreate 4 - Brushes that WOW! Log in. This is actually the color of my old school uniform. You're going to drop it and fill the entire layer so you shouldn't be able to see anything underneath at this stage. Filed Under: Procreate, Procreate Brushes, Is there anything better than creating art? Let's add a new layer, and there is a tip here, if you have a layer and you want to see it and none of the other layers, you can just press and hold as little checkmark and when you do that, that layer becomes visible and all others become invisible.

Let's go and fill it with the next gray color. This time I'm going for green, and again, we're going to make the opacity lower. My name's Helen Bradley and I'm a Skillshare top teacher. Here again, in the same way as we had an overlap issue with the brush earlier, the one that has some gray in it we're getting a darker area where we're overlapping this brush. I'm going to move everything that's here up into the top corner.
Now we have our top piece. Turn on the layers for both the stripe and the circle to create this pattern. Let's go out and come in before we do that. Click to learn more about 'Concept to Keystoke' a course for font creation! You can turn streamline on or not as you wish. If we want the brush to be able to size the grain, to be able to size with the brush. What's happening is that the grain is shifting every time I paint with a brush. Turn on the drawing guide and adjust the grid size to fit your zig-zag pattern. I'm going to set it to 200, 200, 200, which will be a light gray color. It would be good to use as a pattern, but of course it's going to make an excellent grain for our brush.
I'm just going to check my snapping. Changing the brush size when drawing will not change this. Are you looking for a brush set to take your projects to the next level? Now we're getting the colors that we want. I've included a mini brush set of the simple pattern brushes at the bottom of this post. But basically, if you want a gray color, any gray color is going to be where you have equal values for red, green, and blue.
'Recent Searches' : 'Suggested' }}, {{ popoverData().options.toggle.leftTab.title }}, {{ popoverData().options.toggle.rightTab.title }}. StokFella is a secured online Club Savings Account that makes it easier for stokvels to manage their admin, monthly payments and claims on our website using their mobile phones or downloading our app. This time we're going in this corner, turn off the two layers that I've done and select the layers I haven't done, drop my color in, this layer hasn't been done, this one's coming to the bottom corner.
procreate Your Procreate account has been deactivated. Please be sure to manually download this file to your iPad. But can you say that when the brush changes size, the grain is staying the same size?

I know that this patent is perfect. Now we would have a gingham check that's going to vary according to the size of the brush. What it's saying is whatever opacity we select is not going to be varied when we hit the pencil with some extra pressure. The problem is that those gray dots have totally disappeared. You will battle to find anything that comes close to the service that StokFella provides.
brushes You'll get a better result with your finger. Right now this brush is painting so that the grain is scalable in size, if you want it to vary, you'll just go back to the brush, go back to Grain and you're going, instead of zoom, you're going to choose follow size and scale it up a little bit to start off with.