 When these 2 parts are mixed together with a 1:1 ratio, a chemical reaction occurs and liquid mixture hardens into a hard as rock mixture - solid plastic. The entire mixing procedure must take atleast 4-7 minutes. Use only high quality adhesive tape which can withstand the pressure of the resin mixture. Removing the appearance of mold from walls and furniture is one thing,, Read More How to Remove Mold from Wood A Guide on Killing Mold on WoodContinue, Fences are a great way to ensure that you and your family are safe, to mark property lines, and make sure your dog doesnt go about doing its business on your neighbors lawn. The tape only needs to go along the edges of the back of the wood. You can then start sanding the surface, either with an electric sander or you can do it by hand. Looking for a perfect color idea? Resin consolidant will soak into the rotten piece of wood and moisture will get space to exit letting the epoxie soak. Most companies will sell the resin and hardener together. We may earn a small commission from purchases made through them, at no additional cost to you. When filling a hole with epoxy resin, it is best to add a little too much. Wear shielding glasses and a facemask to safeguard your health.
  Make sure to work in an environment that is well-ventilated and since there are some fumes, it is a good idea to wear a mask respirator. If you find your wood to be oily, you can simply apply some acetone.
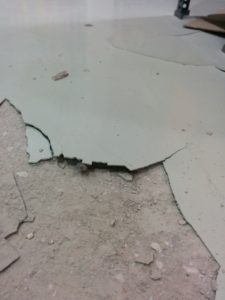
  After resin is poured and spread around the surface, the bubbles may appear. You might have to add several more layers to the mold. The substrate and Surface must be dry and clean. Pieces of decorative art or Jewellery: necklases, bracelets, rings, chains, pendants or earrings can be made out of resin. The liquid then changes becoming gel-like and eventually it cures to a solid and tough surface. When it comes to a wood item, the aim is to create a stronger joint, which the epoxy accomplishes. Thank you! If the resin shrinks, you might find areas that you thought covered, are only partly covered. In time clear resin tends to turn yellow due to sunlight. Calculate the required amount of resin for your project ( use in advance to avoid too little ). Resin will cure completely in 48 hours. If you removed to much of epoxy resin mixture, you can add a second layer of coat. This should enable you to begin your wood and resin projects. The hardness of resin can vary, from soft to hard. The resin that overflows will be stopped by the tape you placed. Label the lids A and B so that you wont confuse what goes where, which could land up gluing the wrong lid to a container. The wikiHow Video Team also followed the article's instructions and verified that they work. Unlike other materials such as metal, where there is little change in effect. IT WILL NOT WORK! Just thought Id double check. Determinte the extent of damage by poking the rotten parts with screwdiver, paint scraper or chisel. This can be attempted about 48 hours after the first coat since the epoxy resin has not hardened completely, the second layer can easily bond with it. Keep moving the torch around, this prevents one spot from becoming too hot. Metal cans or cups from the kitchen that are the same height are great options. How to Make a River Table with Wood and Epoxy Resin Step by Step TUTORIAL. Avoid touching or moving the wood as the epoxy is hardening to make sure it isn't messed up. The surface you are coating should also be level, you want a nice even layer of resin. When you go over this amount, the reaction will produce huge amounts of heat and this can cause the resin to harden straight away. Epoxy Resin contains two part components Resin and Hardener. Nonetheless, more difficult issues could pop up. This is so you can produce excellent results without any problems. These come in medium to high viscosity and cure to a hard and durable surface. You can easily discover new colors with our metallic pigment colours! For the historic wooden items such as furniture, epoxy might not be the best way to use! References By using our site, you agree to our. Get to Know This Classic Hardwood, High-quality, crystal clear casting resin from FGCI, Food Safe formula with no VOC and solvent additives. Try to mix a color that provides a consistent effect. You can make jewelry, pieces of art, pens, and lots more. Yes, you can apply epoxy resin over a stained piece of wood, but you must be sure that the resin is compatible with the stained surface always test in advance to avoid huge mistakes! 6. 4. Once done, whatever you are working on can be placed back in the sun to hasten the curing time. Epoxy resin is the perfect choice when it comes to a product for sealing the wood. This is the easiest method, you simply put the wood inside your mold and pour your epoxy resin over. Another problem is the old and ineffective paint on the woods - the wood absorbs water and rots. You can also use a brush to make sure everything is covered, keep doing this until the wood is saturated. There are many choices for color, each material providing their own properties. Keep in mind that the stain is 100% dry before the surface is furtherprocessed. This is significant, as you only have a certain time to working with the resin. See below on how to use epoxy consolidant. There are wooden items you use extensively every day, however, and these are often prone, Read More How to Remove Heat Stains from Wood Eradicating Heat Marks on WoodContinue, A patch or two of mold in the back of your closet may look harmless. This image may not be used by other entities without the express written consent of wikiHow, Inc.
\n<\/p>
\n<\/p><\/div>"}, {"smallUrl":"https:\/\/www.wikihow.com\/images\/thumb\/b\/b3\/Apply-Epoxy-on-Wood-Step-15.jpg\/v4-460px-Apply-Epoxy-on-Wood-Step-15.jpg","bigUrl":"\/images\/thumb\/b\/b3\/Apply-Epoxy-on-Wood-Step-15.jpg\/aid11683098-v4-728px-Apply-Epoxy-on-Wood-Step-15.jpg","smallWidth":460,"smallHeight":259,"bigWidth":728,"bigHeight":410,"licensing":"
\u00a9 2022 wikiHow, Inc. All rights reserved. The exposed wood also needs to be treated to protect it from liquids. The wood epoxy will waterproof the wood it covers. For transparent or crystal clear projects such as river tables use resin that protects against yellowing. In many cases when working with wood, you will need to sand any excess epoxy off. So, do your research before choosing for best results, you can read up on this in articles about color and Epoxy Resin. You should consider buying a superior quality resin for those items you intend to use a lot. If mixture is already solid, but not yet fully cured, apply one more coat. Two components, a hardener, and the resin, when combined form a solid surface. Measuring and Mixing Epoxy Resin Top Tips on How to Mix Epoxy ( GUIDE )? For this drilling deeper holes might work better. White-washed wood offers a clean yet rustic and textured look to the wood. I was reading your article, the Epoxy Tutorial page and just out of curiosity, is this what you meant to write? Is Wood Epoxy Resin as strong as Wood itself? So, great for river tabletops, bar tops, glass items, tumblers, a variety of craft projects and repair jobs at home. In these two instances, new materials were incorporated to solve the problem. It's a perfect knive for scraping away loose paint and putty during wood repair. Remove these parts or secure with an epoxy consolidant. The wood surface should be prepared thoroughly before coating with epoxy resin. When sanding, you can fold your sandpaper around something that is cylinder-shaped, to get a better outcome. And with a solid scientific background influencing our approach, these skills, together with our ability to work with and through people, translate into a broad range of capabilities within a wide array of applications. This image may not be used by other entities without the express written consent of wikiHow, Inc.
\n<\/p>
\n<\/p><\/div>"}, {"smallUrl":"https:\/\/www.wikihow.com\/images\/thumb\/4\/4c\/Apply-Epoxy-on-Wood-Step-4.jpg\/v4-460px-Apply-Epoxy-on-Wood-Step-4.jpg","bigUrl":"\/images\/thumb\/4\/4c\/Apply-Epoxy-on-Wood-Step-4.jpg\/aid11683098-v4-728px-Apply-Epoxy-on-Wood-Step-4.jpg","smallWidth":460,"smallHeight":259,"bigWidth":728,"bigHeight":410,"licensing":"
\u00a9 2022 wikiHow, Inc. All rights reserved. With knowledge and practice across the varied spectrum of commerce, our entrepreneurial spirit, aptitude coupled with a deep commitment to results are what sets us apart. Last Updated: January 15, 2021 There are 4 different Ratio Resins: 1:1 ratio ; 2:1 ratio ; 3:1 ratio ; 4:1 ratio. There are 13 references cited in this article, which can be found at the bottom of the page. This article has been viewed 71,180 times. Tip: Check our blog - How To Color Clear Epoxy Resin - Best Resin Colorants for Coloring? Epoxy Resin, Wood and Wine CorkIdea for cutting board. Metallic Resin Dye will create gorgeous rippled metallic and shimmery effects in river tables, wooden boards, counter tops, floors, castings, coatings and much much more! Epoxy resin for wood is a good way to make repairs to your wood item. A cloth and polishing paste are great for the small pieces. When the epoxy resin reaction gets too hot, it could cause problems even melting materials nearby. You can use a good quality tape, which should be able to resist the resin liquid. To apply the best solution, you need to ascertain exactly what the problem is. Wouldnt completely hardened surfaces be the least difficult to sand and polish? When working with wood you get many different kinds, some with knots or cracks which provides a certain uniqueness. For a thin layer, you can try adding consolidant to the area first and then filler to reach the correct thickness. This image is not<\/b> licensed under the Creative Commons license applied to text content and some other images posted to the wikiHow website. If you don't have a spatula to use, any other straight, hard surface will work to drag the epoxy across the wood evenly. If you notice that too much epoxy has been removed, you can easily add another layer. Do it thoroughlyand don't rush the process. Once you dryed the surface, you can sand the surface by hand or sandpaper. The best tip to speed up the cure time is to increase the working/room temperature. Using a mixing board, mix the two parts thoroughly. It takes a lot of stress when you discover that your working wood has been rotted. For the best results, you can also add some resin paste. Dear team The product is approved by the FDA and can, therefore, be used on surfaces where food will be. To attain excellent adhesion to the wood, you need to consider a few things. Again, preparation is important as there will be little time change things once you have started to pour. This means you will have to apply another layer, and this costs more money and time. Wooden sticks, plastic or wooden spatulas are great for mixing small amounts of resin. This article was co-authored by wikiHow Staff. This post may contain affiliate links. To ensure everything works according to plan, you can do a small test beforehand. The soft resin can be marred by scratches, while the hard resin is scratch-proof and can take higher temperatures. Resin material is used not only in science, photography industry and boat building, but also in different type of Art. This image may not be used by other entities without the express written consent of wikiHow, Inc.
\n<\/p>
\n<\/p><\/div>"}, {"smallUrl":"https:\/\/www.wikihow.com\/images\/thumb\/a\/ad\/Apply-Epoxy-on-Wood-Step-6.jpg\/v4-460px-Apply-Epoxy-on-Wood-Step-6.jpg","bigUrl":"\/images\/thumb\/a\/ad\/Apply-Epoxy-on-Wood-Step-6.jpg\/aid11683098-v4-728px-Apply-Epoxy-on-Wood-Step-6.jpg","smallWidth":460,"smallHeight":259,"bigWidth":728,"bigHeight":410,"licensing":"
\u00a9 2022 wikiHow, Inc. All rights reserved. Create deep metallic and shimmer effects in casting and coating epoxies. Take some good quality tape and place around each crack or hole, this will stop the resin from going everywhere. We will show you a step bystep guide how to easily do this. Test out the epoxy to see how hard it is, as long as it does not dent, you can begin sanding. The wood is rotting due to moisture that is emitted through other object. We always recommend to wear a respirator or mask, nitrile gloves and work in a well ventiliated area to avoid contact with the fluid. Rub in a circular motion over the surface, ( don't spread the paste onto the wood the pores will get clogged ). As we begin to end our article, we hope you have gained a new understanding of what is possible with epoxy for wood. This to ensure the consolidant spreads out more efficiently. You can test the damage to the wood by simply using a screwdriver, jab at a few pieces and see what the wood does. Project 3: Resin Casting with Wood Epoxy Casting. Try not to drill through the wood, but if you do, simply use some putty to fill the hole and stop the consolidant from leaking out. You can easily use epoxy resin to seal the wood and make durable repairs to your wood. This image may not be used by other entities without the express written consent of wikiHow, Inc.
\n<\/p>
\n<\/p><\/div>"}, {"smallUrl":"https:\/\/www.wikihow.com\/images\/thumb\/a\/a0\/Apply-Epoxy-on-Wood-Step-8.jpg\/v4-460px-Apply-Epoxy-on-Wood-Step-8.jpg","bigUrl":"\/images\/thumb\/a\/a0\/Apply-Epoxy-on-Wood-Step-8.jpg\/aid11683098-v4-728px-Apply-Epoxy-on-Wood-Step-8.jpg","smallWidth":460,"smallHeight":259,"bigWidth":728,"bigHeight":410,"licensing":"
\u00a9 2022 wikiHow, Inc. All rights reserved. This image is not<\/b> licensed under the Creative Commons license applied to text content and some other images posted to the wikiHow website. Heat the new layer to avoid bubbles and keep sanding with 80 grit paper, to refine your work use 120 grit sand paper. If the new brand epoxie resin is mixed with the other manufacturer's remains of hardened resin, it will react a chemical reaction and reduce your working time. Once the mixture begins to harden, it first appears gel-like, at this stage, you should stop working on it. You can add resin pigments, liquid dye, alcohol inks, even kitchen supplies such as spices, sidewalk chalks or even cosmetic products eyeshadow powders. Crystal Clear Blue Epoxy Resin River Table Top. Pour enough epoxy to cover the edges of the wood as well, wiping up any excess or drips using the foam brush. Simply follow instructions and make sure you know about any precautions before you begin. It's great for covering wood to create a protective, beautiful layer on top and is used in lots of different craft projects. Also, preferably wait until fully hardened before using your item. Adding to Much Hardener to Speed Up Curing Time. Finish this step by painting over another normal layer, this should then last an exceptionally long time. Mix very well and properly for atleast 4-7 minutes. The right produce for mixing resin will determine success or failure in processing. How is this done? If you do consider removing the epoxy, you might want to think again, as it is a big job and will take you quite a while to do. Our team is highly motivated, fast-learning, task and detail-oriented with a proven ability to identify, analyze, and solve problems. It's very easy to fix this problem, just apply another coat of paint. % of people told us that this article helped them. Completely hardened surface sanding and polishing becomes more difficult. Epoxy resin can also be used on countertops and floors. Sandpaper by hand smaller items and for bigger projects, make use of an electric sander. The more accurate your work, the less you will have to do. wikiHow, Inc. is the copyright holder of this image under U.S. and international copyright laws. Finally, let the epoxy harden for 24 hours before removing the tape. Here, you can simply apply another fresh coat of good quality paint. Baltic Day resin contains a highest-quality UV filter that protects your cured art work from UV radiation and yellowing. 8. From identification to implementation, Play Projects is the ideal partner to plan, manage and/or execute your projects. At Press Play we deliver intelligent solutions that simplify the process for businesses to stay in step with the dynamically changing technology landscape. bubbles cured resin fix artresin clear  Heat is the most important thing of all factores, the hotter the mixture faster curing process. epoxy metal mannol liquid filler steel hELLO!!!! You can easily use it for a deep pour, which will help to get rid of any problems like crawling, fisheyes, or craters. If you think you can save the wood, then drill 0.25 inch holes and let the epoxy consolidant work. Now you can add resin colors into mixture. How to Whitewash Wood A Guide on Different White Wash Techniques, Acacia Wood How to Use and Care for Acacia Wood, How to Remove Heat Stains from Wood Eradicating Heat Marks on Wood, How to Remove Mold from Wood A Guide on Killing Mold on Wood, How to Build a Wood Fence A Guide to Privacy Fence Construction, How to Remove Paint from Wood A Guide to Stripping Woodwork, Epoxy resin can also be used on countertops, FGCI Liquid Glass Deep Pour Casting Resin, PROMARINE Crystal Clear Table Top Coating Resin, remove the paint as well as the rotten wood, Best Epoxy Glue Where and How to Use Epoxy Adhesives, Acacia Wood vs. Teak Which Durable and Water-Resistant Wood to Use, What Is Beechwood?